Charging a LiFePO4 battery is actually quite straightforward, but a few key details will determine how long it lasts. The most important thing is to use a dedicated lithium battery charger that operates in CC CV mode. In the beginning, the charger delivers a steady current to quickly replenish energy.
Once the voltage gets close to the full charge point of 3.65V per cell, it automatically switches to constant voltage, and the current gradually drops until the battery is completely full.
You should definitely avoid using lead-acid battery chargers. Their desulfation pulse or trickle charge functions can easily damage the lifespan of a lithium battery.
Temperature also matters a lot; the ideal range is between 0°C and 45°C. Never force a charge in freezing temperatures because it causes permanent lithium plating damage inside the cells.
If you want the battery to stay healthy for as long as possible, try not to fully charge or drain it every single time. Keeping the charge level between 20% and 80% is the best way to maintain it.
Practical Guide to Charging LiFePO4 Batteries
| Stage | Steps / Precautions | Key Details |
| 1. Preparation | Check charger label | Must specify LiFePO4 or Lithium Iron Phosphate. |
| 2. Connection | Battery first, then Power | Connect clamps (Red+, Black-) first, then plug into the wall. |
| 3. Charging | Monitor indicators | Red light means charging; Green light means full. |
| 4. Completion | Power first, then Battery | Unplug from the wall first, then remove the clamps. |
| Temperature | No charging below 0°C | If the battery is freezing, warm it to room temp first. |
| Maintenance | Keep 20% - 80% SOC | Don't feel forced to hit 100%; avoid dropping to 0%. |

related article: Charging Lithium Battery With Lead Acid Charger: The Risks
Charging Voltage Reference Table for LiFePO4 Batteries (12V/24V/48V)

Critical Charging Parameters: Voltage, Current, and Temperature
Voltage, current, and temperature are the core factors in LiFePO4 battery charging management. Only by balancing all three can you ensure safety while maximizing charging speed and efficiency.
1. Voltage (V) - "The Driving Force"
Voltage determines whether the electrical energy can actually enter the battery.
- Charging Threshold: Every battery has a rated voltage (e.g., 3.7V for most lithium-ion batteries). The charging voltage must be slightly higher than the battery's current voltage for the charge to "flow" in.
- Cut-off Voltage: When the voltage reaches a preset upper limit (e.g., 4.2V), the battery is considered full. Overvoltage can cause the electrolyte to decompose, potentially leading to fires or explosions.
2. Current (A) - "The Flow Rate"
Current determines how fast the battery charges.
- C-rate: A higher current means a faster charge.
- Charging Phases:
- Constant Current (CC): When the battery is low, it is charged with a constant high current for speed.
- Constant Voltage (CV): As the battery nears full capacity, the current gradually decreases to protect the cells.
3. Temperature (T) - "Health and Safety"
Temperature is the most sensitive variable during the charging and discharging process.
- Optimal Range: Charging efficiency is highest between 15°C and 35°C (59°F - 95°F).
- Low-Temperature Risks: Charging below 0°C (32°F) can cause "lithium plating," which permanently damages battery life and stability.
- High-Temperature Risks: High-current charging generates heat. If the temperature exceeds safe limits (usually 45°C–60°C), it can trigger thermal runaway, leading to fire.
Summary
You can compare these three to filling a tank with a water pipe:
- Voltage is the water pressure (if the pressure is too low, the water won't move).
- Current is the flow rate (if the flow is too fast, the pipe might burst).
- Temperature is the condition of the pipe (if it's too cold, it gets brittle; if it's too hot, it might melt).
The 3-Stage LiFePO4 Charging Profile: CC, CV, and Float
For LiFePO4 batteries, a three-stage charging process is preferred as it offers the best balance between cycle life and operational safety.
1. Constant Current Stage (CC) - The Bulk Charge
This is the initial and most efficient phase of the charging process.
- Action: The charger provides a fixed maximum current (based on the battery's C-rate).
- State: The battery voltage rises steadily from its discharged state until it reaches the predefined voltage limit.
- Purpose: To quickly restore the battery to approximately 80%–80% of its capacity.
2. Constant Voltage Stage (CV) - The Absorption Charge
Once the voltage hits the upper limit (typically 3.6V–3.65V per cell), the charger enters this stage.
- Action: The charger holds the voltage constant, while the current begins to taper off (decrease) gradually.
- State: As the battery nears full saturation, its internal resistance increases, drawing less current. The stage ends when the current drops to a very low level (e.g., 5% of the rated current).
- Purpose: To top off the remaining 10%–20% capacity safely and ensure all cells are balanced without overcharging.
3. Float Stage - Maintenance & Compensation
The Float stage for LiFePO4 differs slightly from traditional Lead-Acid battery logic.
- Action: The charger drops the voltage to a lower maintenance level (typically 3.3V–3.4V per cell).
- State: Minimal to no current flows into the battery unless there is self-discharge or an external load drawing power.
- Purpose: To counteract self-discharge and keep the battery at 100% State of Charge (SoC).
Note: Since LiFePO4 batteries do not like being held at 100% indefinitely, many modern chargers will actually terminate the charge completely after the CV stage rather than floating.
Comparison Table
| Stage | Voltage | Current | Main Function |
| CC (Bulk) | Rising | Constant | Fast bulk energy recovery |
| CV (Absorption) | Constant | Decreasing | Precise topping off to 100% |
| Float | Dropped to lower level | Very Low / Zero | Offsetting self-discharge |
Parallel Charging Configuration: Balancing and Connection Guides
So-called parallel charging means connecting the positive terminals together and the negative terminals together. This increases the total amp-hour capacity of the battery pack without changing the voltage.
1. The Golden Rule: Voltage Matching
Before connecting batteries in parallel, all batteries must be at nearly the same voltage (ideally within a 0.1V difference).
- The Risk: If voltages are different, the high-voltage battery will "dump" current into the low-voltage battery at an uncontrolled rate, which can cause sparks, melted wires, or fires.
- The Fix: Fully charge each battery individually before connecting them together.
2. Connection Guide: Diagonal Wiring
To ensure each battery in the bank is charged and discharged equally, you should use diagonal (cross-corner) wiring.
- The Common Mistake: Connecting both the charger's positive and negative leads to the first battery in the row. This causes the first battery to work the hardest and age faster, while the last battery stays undercharged.
- The Correct Way: Connect the charger's Positive (+) lead to the first battery and the Negative (-) lead to the last battery in the string.
3. Balancing and Consistency
While parallel batteries "self-balance" their voltage, long-term health depends on consistency:
- Identical Specs: Always use batteries of the same brand, capacity (Ah), and age. Never mix an old battery with a new one.
- Current Distribution: The total charging current is split among the batteries. Example: A 10A charger feeding two parallel batteries will provide roughly 5A to each.
- BMS Requirements: For LiFePO4 batteries, ensure each individual battery has its own BMS.
4. Pros and Cons at a Glance
| Pros | Cons |
| Increased Capacity: Extends the total runtime. | Uneven Current: If cables have different lengths/resistances, batteries age unevenly. |
| Self-Balancing: Batteries naturally equalize their voltage. | Difficult Troubleshooting: One bad cell can drain the entire healthy bank. |
| Simple Charging: You can use your original voltage-rated charger. | Heavy Wiring: Requires thick busbars/cables to handle the combined total current. |

Series Charging Strategy: Voltage Sync and BMS Requirements
Series connection refers to connecting the positive terminal of one battery to the negative terminal of the next in sequence. This configuration increases the total voltage while keeping the capacity unchanged, but it also places higher demands on charging balance and consistency.
1. Core Logic: Voltage Summation
![]()
- Example: Connecting two 12V 100Ah batteries in series creates a 24V 100Ah bank.
- Charger Requirement: You must use a charger that matches the total system voltage (e.g., a 24V charger for a 24V system).
2. Critical BMS Requirements
In a series system, a BMS is mandatory, especially for lithium batteries:
- Overvoltage Protection: During charging, if one battery reaches full capacity before the others, the BMS must trigger a cutoff. Without this, that specific battery would be overcharged, leading to damage or fire.
- Individual Monitoring: The BMS monitors the voltage of every individual cell or battery block. The lifespan of a series string is limited by the "weakest link" (the cell with the lowest capacity).
3. Voltage Sync and Balancing
The biggest challenge in series charging is Imbalance.
The Problem: Even with identical models, slight differences in internal resistance cause voltages to drift apart after several cycles.
The Solutions:
- Active/Passive Balancing: The BMS bleeds off excess energy from high-voltage cells (passive) or transfers it to low-voltage cells (active).
- Battery Equalizers: For high-power systems, adding an external dedicated battery equalizer is highly recommended to ensure all batteries remain synchronized in real-time.
4. Connection Guidelines
- The "Same" Rule: You must use identical batteries (same brand, model, capacity, age, and preferably the same production batch). Never mix old and new batteries.
- Tight Connections: Ensure all series links are torqued correctly. A loose connection creates high resistance, leading to heat buildup and potentially melting the battery terminals.
5. Quick Comparison: Series vs. Parallel
| Feature | Series | Parallel |
| Primary Goal | Increase Voltage (V) | Increase Capacity (Ah) |
| Voltage Change | Additive (12V + 12V = 24V) | Stays the same (12V) |
| Capacity (Ah) | Stays the same (100Ah) | Additive (100Ah + 100Ah = 200Ah) |
| Main Risk | Individual cell imbalance | High surge current during initial link |
What is the best way to charge LiFePO4 batteries using solar?
1. Core Hardware: Choosing the Right Controller
LiFePO4 batteries are sensitive to voltage; never use a standard lead-acid charging profile.
- MPPT Controller (Highly Recommended): Features "Maximum Power Point Tracking," which is 20%-30% more efficient than PWM controllers. Most modern MPPTs allow for custom lithium charging curves.
- LiFePO4 Dedicated Mode: Ensure your controller has a "Lithium" or specific "LiFePO4" setting. If it doesn't, you must manually program the parameters.
2. Key Voltage Parameter Settings
If your controller supports manual settings (User Mode), use these typical values (for a 12V system):
| Parameter | Recommended (12V) | Note |
| Absorption Voltage | 14.4V - 14.6V | Ensures cells are fully charged and balanced. |
| Float Voltage | 13.5V - 13.8V | Lithium doesn't strictly need floating; keep this low to reduce stress. |
| Low Voltage Cut-off | 11.0V - 11.5V | Prevents permanent damage from over-discharge. |
| Equalization | OFF / 0V | Never perform high-voltage equalization on Lithium. |
3. Critical Charging Precautions
Temperature Restrictions (Most Important)
- No Cold Charging: Never charge LiFePO4 batteries below 0°C (32°F). Charging in freezing temperatures causes lithium plating, which leads to permanent damage or internal shorts.
- The Fix: Use a controller or BMS with "Low-Temperature Cut-off," or keep your batteries in a temperature-controlled environment.
Charge Rate (C-Rate)
While LiFePO4 can handle fast charging, the "sweet spot" for longevity is between 0.2C and 0.5C.
Example: For a 100Ah battery, aim for a solar charge current between 20A and 50A.
The Role of the BMS
Ensure your battery has a quality BMS (Battery Management System). This is your last line of defense against over-charging, over-discharging, and cell imbalance.
4. Best Practice Tips
- Partial Cycles: You don't need to charge to 100% every day. Keeping the battery between 20% and 90% State of Charge can significantly extend its cycle life.
- Wire Gauge: Use thick enough cables between the panels, controller, and battery to minimize voltage drop. This ensures the controller reads the battery's true voltage.
- Periodic Balancing: Once every month or two, charge to 100% to allow the BMS to balance the individual cells.
how to charge a 12v lifepo4 battery?
1. Choose the Right Charger
This is the most critical step. LiFePO4 batteries have a very stable voltage platform and a specific charging curve.
- Dedicated Lithium Charger (Recommended): It is best to use a charger with a specific LiFePO4 mode. These typically use the CC/CV (Constant Current/Constant Voltage) algorithm.
- Lead-Acid Chargers (Use with Caution): You can only use a lead-acid charger temporarily if it does not have "desulfation" or "pulse repair" modes.
Warning: Never use a lead-acid charger with an automatic repair/desulfation function. The high-voltage pulses can damage the battery's BMS.
2. Core Charging Parameters
For a standard 12V LiFePO4 battery (usually consisting of 4 cells in series):
| Parameter | Recommended Value | Note |
| Charging Voltage | 14.2V - 14.6V | Exceeding 14.6V may trigger BMS protection. |
| Float Voltage | 13.5V - 13.8V | Use this range if the battery remains connected long-term. |
| Termination Current | 0.02C - 0.05C | The battery is full when the current drops to this level. |
| Cell Voltage Limit | 3.65V | The maximum voltage limit per individual cell. |
3. The Three Stages of Charging (CC/CV)
- Bulk Stage (Constant Current/CC): The charger outputs a constant current while the voltage slowly rises. This is the fastest phase, replenishing about 80%–90% of the capacity.
- Absorption Stage (Constant Voltage/CV): Once the voltage reaches the set point (e.g., 14.4V), the voltage stays constant while the current gradually tapers off. This tops off the battery and allows for cell balancing.
- Termination/Float: LiFePO4 batteries do not require long-term high-voltage float charging like lead-acid batteries. Once full, it is best to disconnect or drop to a lower float voltage (around 13.6V).
4. Alternative Charging Methods
- Solar Charging: Use an MPPT controller that supports LiFePO4 settings.
- Alternator (Vehicle): It is highly recommended to use a DC-to-DC battery charger. Connecting directly to an alternator can be risky because LiFePO4 batteries have very low internal resistance, which could draw too much current and overheat the alternator.
Why You Must Use a Dedicated LiFePO4 Battery Charger?
LiFePO₄ batteries must be charged with a dedicated, compatible charger. Standard lead-acid chargers often use pulse or desulfation modes, and these momentary high-voltage spikes can be fatal to a lithium battery's BMS and cells.
The charging logic is also fundamentally different. After completing the CC/CV stages, a LFP battery requires the power to be fully cut off, rather than being maintained with a trickle charge like a lead-acid battery. Continuing to supply current can lead to overcharging.
A dedicated LiFePO₄ charger strictly caps the cell voltage at 3.65V per cell, ensuring the battery reaches full charge without ever crossing safe limits.
Technical Criteria for Selecting a Compatible LFP Charger
When choosing a charger, it's best to check the manual directly. Only devices labeled "LiFePO₄ Dedicated" are the specialized models we need.
| Technical Criteria | Requirement | Why It Matters |
| Charging Profile | CC/CV (Constant Current / Constant Voltage) | Ensures efficient bulk charging followed by precise voltage regulation to prevent stress. |
| Termination Voltage | 14.6V (for 12.8V systems) | Corresponds to 3.65V per cell. Anything higher risks thermal runaway; lower results in an incomplete charge. |
| Trickle Charge | None / No Float | LFP batteries cannot handle continuous low-current charging. The charger must shut off completely once full. |
| Recovery Mode | No Desulfation / Pulse | Lead-acid "repair" modes use high-voltage spikes (15V+) that can destroy the battery's BMS or cells. |
| BMS Wake-up | 0V Activation Feature | If the BMS triggers "Low Voltage Cut-off," a dedicated charger can provide a small signal to "wake up" the battery. |
| Temperature Control | Low-Temp Cut-off | Charging LFP below 0°C (32°F) causes lithium plating, leading to permanent capacity loss or internal shorts. |
Comparison: Dedicated LiFePO4 Chargers vs. Standard Chargers
| Feature | Dedicated LiFePO4 Charger | Standard (Lead-Acid/AGM) Charger | Impact on LFP Battery |
| Charging Logic | 2-Stage CC/CV (Constant Current / Constant Voltage) | 3-Stage (Bulk, Absorption, Float) | Standard chargers may stay in "Absorption" too long, causing stress. |
| Full Charge Voltage | Fixed at 14.6V (for 12V packs) | Varies (14.1V to 14.8V) | Inconsistent voltages can lead to undercharging or BMS shutdown. |
| Float Charge | None (Turns off at 100%) | Constant 13.5V - 13.8V | Continuous "trickle" causes plating and reduces lithium lifespan. |
| Equalization Mode | None | Automatic High Voltage (15V+) | EXTREMELY DANGEROUS: Can fry the BMS and damage cells instantly. |
| Recovery Mode | 0V/BMS Wake-up feature | Desulfation Pulse | Standard pulses can be misinterpreted by BMS as a short circuit. |
| Efficiency | Very High (95%+) | Moderate (75-85%) | Dedicated chargers charge 4x faster with less heat. |
related article: Charging Lithium Battery With Lead Acid Charger: The Risks
BMS Settings for "Zero-Wear" Charging: The Ultimate Guide to LiFePO4 Voltage Thresholds
If you want your LiFePO4 battery to last exceptionally long, the key is to avoid extreme states of charge-that is, don't fully charge it and don't fully drain it.
If you plan to enable this long-life mode by adjusting the BMS settings, you can refer to the following voltage guideline for a 12V 4-series system:
LiFePO4 Voltage Thresholds for Longevity
| BMS Setting | Standard (100% SoC) | Zero-Wear Mode (Recommended) | Why This Works |
| Cell High Cut-off | 3.65V | 3.45V - 3.50V | Prevents electrolyte decomposition at high voltage. |
| Total Charge Voltage | 14.6V | 13.8V - 14.0V | Reaches ~90-95% SoC but can double cycle life. |
| Float Voltage | 13.5V - 13.8V | OFF (Recommended) | LFP doesn't need float; resting at 100% causes stress. |
| Cell Low Cut-off | 2.50V | 3.00V | Prevents physical damage from deep discharge. |
| Total Discharge Cut-off | 10.0V | 12.0V | Maintains a safety buffer of ~10-15% capacity. |
| Balance Start Voltage | 3.40V | 3.40V | Balancing should only occur during the top-end charge. |
Three Core Strategies for "Zero-Wear"
- The 80/20 Rule (Shallow Cycling): The "sweet spot" for LFP is between 20% and 80% State of Charge. Limiting the upper voltage to 3.50V per cell can extend cycle life from the standard 3,000 cycles to over 5,000–8,000 cycles.
- Lower Charge Current: While LFP supports fast charging, maintaining a rate of 0.2C to 0.3C (e.g., 20A–30A for a 100Ah battery) significantly reduces internal heat and chemical stress.
- Low-Temperature Discipline: Ensure the BMS has a 0°C (32°F) Charge Cut-off. Charging in freezing temperatures causes "Lithium Plating," which leads to irreversible capacity loss and internal short circuits.

BMS Charging Protection: What to Do When Your LiFePO4 Stops Charging?
When you find that a LiFePO4 battery isn't charging, it's often because the Battery Management System has proactively disconnected the circuit to protect the cells. This does not mean the battery is damaged; it's usually the internal safety mechanism at work.
Common Causes and Troubleshooting
| Symptom | Possible Cause | Solution |
| Low-Temperature Protection | Ambient temperature is below 0°C (32°F). | Move the battery to a warmer area or activate the heating pad; it will resume once the temperature rises. |
| Cell Over-Voltage Protection | One individual cell reached 3.65V early, even if the total pack isn't full. | Lower the charging voltage to ~14.4V and allow the BMS time to "Balance" the cells. |
| High-Temperature Protection | High charge current or poor ventilation caused temps above 55-60°C. | Stop charging, improve airflow, and reduce the charging current (recommended below 0.5C). |
| BMS Logic Lock | Severe overcharge or short-circuit triggered a hard protection. | Disconnect all loads/chargers, wait a few minutes, or use a charger with a 0V wake-up feature. |
| Wiring Fault | Loose cables, blown fuses, or excessive voltage drop. | Inspect all connection points; ensure terminals are tight and free of corrosion. |
Core Action Steps
Measure Voltage: Use a multimeter to check the voltage at the battery terminals. If it reads 0V, the BMS has tripped and cut off the output.
Wait and Observe: Many protections (like over-temperature or over-voltage) will automatically reset once the voltage settles or the temperature drops.
Try to "Wake Up" the Battery: If the BMS locked due to over-discharge, you need a charger with a LiFePO4 wake-up function or briefly connect it in parallel with another battery of the same voltage to "jump-start" the BMS.
Check Cell Balance: If you have a Bluetooth app for your BMS and notice a voltage gap (Delta > 0.1V), use a low-current charge to allow the BMS to finish top-balancing the cells.
What is the Safe Temperature Range for Charging LiFePO4 Batteries?
LiFePO4 batteries are highly sensitive to temperature, especially during charging. To ensure the battery is both durable and safe, it is recommended to strictly follow the following temperature ranges during operation:
LiFePO4 Charging Temperature Guide
| Status | Temperature Range | Recommendations & Consequences |
| Optimal Range | 10°C to 35°C (50°F - 95°F) | Highest chemical activity and efficiency; minimal battery wear. |
| Allowable Range | 0°C to 45°C (32°F - 113°F) | The standard safety window set by most BMS units. |
| Strictly Forbidden | Below 0°C (< 32°F) | EXTREMELY DANGEROUS: Causes "Lithium Plating," leading to permanent damage or internal shorts. |
| High-Temp Warning | Above 45°C (> 113°F) | Accelerates chemical degradation. BMS typically cuts off charging above 60°C. |
Why is Low-Temperature Charging a "Red Zone"?
Charging at below 0°C prevents lithium ions from properly embedding into the anode. Instead, they accumulate on the surface as metallic lithium, a phenomenon known as "Lithium Plating." These needle-like crystals (dendrites) can puncture the separator, causing irreversible capacity loss or fire hazards.
Winter Usage Tips
- Pre-heat the Battery: If the environment is below freezing, warm the battery using a heater or by running a small load (discharging generates internal heat) until the internal temperature is above 5°C.
- Self-Heating Batteries: Consider batteries with built-in heating films that use the incoming charging current to warm the cells before allowing the charge to flow.
- Reduce Current: If you must charge near the 0°C threshold, drop the current to 0.1C (e.g., 10A for a 100Ah battery) to minimize stress.
Breaking the Freeze: New Solutions for Charging LiFePO4 in Sub-Zero Temperatures
When LiFePO4 batteries fail to charge in cold temperatures, the current solution is no longer simple insulation wrapping-it relies on more efficient active heating technology.
The most advanced approach in the industry embeds self-heating films inside the battery. When the charger is connected and the BMS detects a temperature below 0°C, the current first powers the heating film. The heat generated raises the internal battery temperature quickly to a safe zone above 5°C, after which the system automatically switches back to normal charging mode.
Additionally, some high-end solutions optimize the electrolyte for low-temperature performance and use staged charging logic. In cold conditions, a tiny current is applied first to gently "test" the battery, preventing lithium plating. Some systems even use heat pump technology to recycle the waste heat generated during charging. With these technologies, LiFePO4 batteries can operate fully automatically in extreme cold, effectively solving the winter charging problem.
Common Mistakes in LiFePO4 Battery Charging Operations
Many users often run into issues when charging LiFePO₄ batteries, usually because they are still relying on the same practices used for maintaining lead-acid batteries or are not fully aware of the performance limits of lithium batteries.
| Common Mistake | Root Cause | Potential Consequence |
| Charging Below 0°C (32°F) | Assuming the battery can charge as long as power is available. | Fatal Damage: Causes irreversible "Lithium Plating," leading to capacity loss or internal shorts. |
| Using "Desulfation" Chargers | Using lead-acid chargers with a "Repair" or "Pulse" mode. | BMS Failure: High-voltage spikes can instantly fry the electronics on the Protection Circuit Board. |
| Keeping at 100% (Float) | Leaving the charger plugged in indefinitely like a backup UPS. | Accelerated Aging: High voltage stress decomposes the electrolyte and shortens cycle life. |
| Ignoring Cell Imbalance | Only monitoring total voltage instead of individual cell voltages. | Reduced Capacity: Causes the BMS to trip early, preventing the pack from reaching its full potential. |
| Excessive Charge Current | Using a high-amp charger (above 1C) to save time. | Overheating: Causes internal gassing and reduces the chemical stability of the cells. |
| Forced Parallel Wake-up | Connecting a full battery to a "locked" empty one to jump-start it. | Current Surge: Massive voltage differences can cause dangerous sparking or melted wires. |
Identifying and Preventing Thermal Runaway in LiFePO4 Batteries
Although LiFePO₄ is widely recognized as the safest lithium battery technology, it can still experience thermal runaway if subjected to severe physical damage, overcharging, or extremely high temperatures. Therefore, learning to spot early warning signs and taking preventive measures is crucial.
How to Identify Warning Signs of Thermal Runaway?
| Dimension | Abnormal Sign | Urgency Level |
| Abnormal Heat | The battery casing is too hot to touch (over 60°C/140°F) and temperature continues to rise during charging. | Critical: Disconnect power immediately. |
| Casing Deformation | Visible swelling, bloating, or cracking of the battery case. | High: Indicates internal gassing. |
| Unusual Odors | A sweet or chemical smell similar to nail polish remover (indicating electrolyte leakage). | Critical: Potential internal short circuit. |
| Frequent BMS Trips | The battery frequently shuts down due to high-temperature or over-current alerts before reaching full charge. | Medium: Requires professional inspection. |
How to Prevent Thermal Runaway?
- Physical Protection: Ensure the battery is securely mounted to avoid heavy vibration or punctures. Thermal runaway in LFP is often triggered by an internal short circuit caused by physical impact.
- Strict Voltage Limits: Never bypass the BMS. Overcharging causes the cathode structure to collapse, releasing heat.
- High-Quality Connections: Periodically check that cable terminals are tight. High resistance from loose connections creates localized heat that is often mistaken for battery thermal runaway.
- Environmental Control: Ensure the battery compartment is well-ventilated and shielded from direct sunlight. Stop operations if ambient temperatures approach 60°C (140°F).
- Use a Reliable BMS: Choose a high-quality BMS with active thermal shutdown capabilities to ensure the circuit is cut the moment an abnormal temperature rise is detected in any cell.
⚠️ Emergency Reminder: If you see smoke or fire, while LiFePO4 does not explode as violently as NCM (cobalt-based) batteries, the smoke released is still toxic. Use an ABC Dry Chemical fire extinguisher or large amounts of water to cool the cells and evacuate the area immediately.
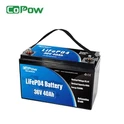
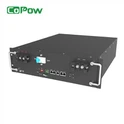
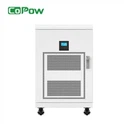
Advanced CC/CV Charging: Exploring Copow Charger Safety Features (12V/24V/48V)
The Copow charger for 12V, 24V, and 48V LiFePO4 systems utilizes precise digital control technology. During the constant current (CC) phase, it delivers a stable current to quickly replenish the battery, effectively preventing heat buildup caused by current fluctuations.
Once the battery voltage reaches the safe threshold-for example, 14.6V for a 12V system-the charger smoothly switches to constant voltage (CV) mode. The voltage is strictly locked, and the current naturally tapers off, completely eliminating the risk of cell overvoltage.

For safety, this charger integrates low-temperature cutoff protection, preventing lithium plating in cold conditions, and also features real-time over-temperature monitoring, short-circuit protection, and reverse polarity prevention. Its adaptive algorithm can even wake up a BMS that is in deep sleep.
This deep compatibility not only makes charging more efficient but also extends the battery's lifespan from a fundamental level, making it a reliable solution for ensuring long-term stable operation of LiFePO4 systems.
Conclusion
Mastering LiFePO4 battery charging techniques is key to keeping your energy system both safe and long-lasting. Although these batteries are inherently robust, their chemical properties make them very sensitive to charging conditions and voltage precision.
The most reliable way to prevent battery damage from the start is to use a dedicated charger with constant current/constant voltage (CC/CV) functionality and always charge in temperatures above 0°C.
At the same time, you must completely abandon old lead-acid habits-don't try to "revive" the battery with high-voltage pulses, and avoid keeping it at full charge in a continuous float state. By maintaining a routine of shallow charging and discharging-keeping the state of charge between 20% and 80%-internal stress is minimized, naturally extending the battery's lifespan.
Whether it's a simple single battery or a complex series-parallel system, using a charger like CoPow with smart algorithms and wake-up functionality provides efficient charging along with multiple layers of protection.
Over time, this attention to detail not only saves you money on battery replacements but also ensures a stable and reliable power supply during critical moments such as RV trips, home energy storage, or marine applications.
FAQ
Why Should LiFePO4 Batteries Not Be Charged Below 0°C? (Lithium Plating Explained)
Charging LiFePO4 batteries at temperatures below 0°C is not recommended for the following reasons: In low-temperature environments, the rate of electrochemical reactions inside the battery slows down.
During charging, lithium ions struggle to insert into the graphite structure of the anode in a timely manner, causing them to deposit directly onto the anode surface in the form of metallic lithium and form lithium dendrites.
Once this metallic lithium forms, it not only causes irreversible capacity loss but may also develop a dendrite-like structure that pierces the separator, leading to internal short circuits.
This can result in overheating, performance degradation, and even safety risks. Additionally, low temperatures increase the battery's internal resistance, exacerbating local polarization and further increasing the likelihood of lithium precipitation.
Is It Safe to Use a Regular Charger for LiFePO4 Batteries?
Charging LiFePO4 batteries at temperatures below 0°C is not recommended for the following reasons: In low-temperature environments, the rate of electrochemical reactions inside the battery slows down.
During charging, lithium ions struggle to insert into the graphite structure of the anode in a timely manner, causing them to deposit directly onto the anode surface in the form of metallic lithium and form lithium dendrites.
Once this metallic lithium forms, it not only causes irreversible capacity loss but may also develop a dendrite-like structure that pierces the separator, leading to internal short circuits.
This can trigger overheating, performance degradation, and even pose safety risks. Additionally, low temperatures increase the battery's internal resistance, exacerbating local polarization and further increasing the likelihood of lithium plating.