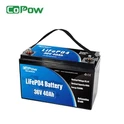
To get the absolute most out of your Lithium Golf Cart Battery and ensure it powers your rides for a decade or more, simply completing the installation is only the first step. While lithium technology is famous for being "maintenance-free," these advanced energy systems actually operate under a completely different set of "survival rules" compared to traditional batteries.
From preventing permanent damage during freezing weather to utilizing smartphone apps for real-time health monitoring, proper care is about more than just convenience-it's about protecting a significant investment and avoiding the frustration of unexpected power failure.
Whether you are a performance enthusiast seeking maximum range or a casual user looking for long-term reliability, this comprehensive guide will teach you how to manage your power core like a pro, keeping your cart in peak condition and always ready for the next hole.

Common Causes & Troubleshooting For Lithium Golf Cart Batteries Losing Charge Quickly
1. Common Causes Analysis
- BMS Misconfiguration: If the protection thresholds in the BMS are set too high or too low, the system may cut power prematurely to protect the cells, making it feel like the battery is draining too fast.
- Cell Imbalance: Lack of full charging cycles or failure to perform balance charging over time can lead to voltage gaps between cells. Once the "weakest" cell hits the cutoff voltage, the entire pack stops discharging.
- Parasitic Loads (Phantom Drain): Accessories like lights, GPS units, USB ports, or sound systems can continuously draw small amounts of current even when the cart is turned off, especially if they are wired incorrectly or bypass the main switch.
- Motor and Controller Mismatch: After upgrading to lithium, an aging motor or incorrectly set controller current limits can cause excessive instantaneous discharge, draining the capacity much faster than expected.
- Extreme Environmental Conditions: Operating in extreme cold or heat significantly impacts lithium ion activity, leading to a temporary drop in effective capacity.
2. Troubleshooting Steps
- Verify Charger Compatibility: Ensure you are using a dedicated LiFePO4 charger. If the charging profile is incorrect, the battery might only reach 80% of its actual capacity before the charger signals it is "full."
- Static Voltage Check: Let the battery rest for a few hours after a full charge and measure the total voltage. For a 48V system, it should typically read above 53V–54V. If it is significantly lower, the pack isn't reaching a full charge.
- Load Testing: Monitor the voltage drop during high-intensity tasks like hill climbing or rapid acceleration. A severe instantaneous voltage sag often indicates a poor connection or a failing cell.
- Check for Parasitic Draw: Use a clamp-on multimeter on the battery output cables after the main power is switched off. If you still detect current flow, an accessory is "stealing" power.
- Check the BMS App: Most modern lithium batteries feature Bluetooth connectivity. Open the mobile app to check the individual voltage of each cell and identify if a single "weak link" is dragging down the entire pack.
Avoiding Low-Quality Lithium Golf Cart Batteries: Brands and Red Flags
1. Red Flags of Low-Quality Lithium Batteries
- Plastic Instead of Metal Casing: Premium golf cart batteries (especially 48V 105Ah+ models) typically use metal enclosures. Metal is superior for heat dissipation and provides the structural integrity needed for bumpy turf environments. Large-capacity batteries in flimsy plastic shells often indicate weak internal construction.
- Waterproofing Below IP67: Golf carts operate on wet grass and muddy paths. If a battery isn't rated at least IP67, moisture ingress is likely to cause circuit failure or corrosion over time.
- "Too Good to Be True" Pricing: If a lithium battery is 30%–50% cheaper than reputable brands-or priced near lead-acid levels-it likely uses refurbished or Grade B/C cells. These cells lack the cycle life and discharge stability required for heavy vehicle use.
- Low Continuous Discharge Rating: Many low-end batteries boast high capacity (e.g., 100Ah) but have a Continuous Discharge Current of only 50A or 80A. A standard golf cart, especially one with a modified motor or hills to climb, needs at least 100A–150A of continuous output to prevent the BMS from tripping during acceleration.
- The "Ghost" Brand: If the seller has no official website, no detailed installation manuals, and no local technical support, they are likely a "pop-up" brand. When you have a warranty claim, these sellers often vanish.
2. Quick Pro-Tips for Buyers
- Weight vs. Volume: While lithium is light, if two batteries claim the same capacity and one is suspiciously light, it likely has "fake" capacity ratings or uses subpar lightweight internal components.
- The Warranty Litmus Test: Reputable brands typically offer a 5 to 10-year warranty. If a seller only offers 1 year or is vague about the details (like who pays for shipping on returns), keep moving.
Bypassing the Onboard Charger (OBC) for Lithium Conversions
When performing a lithium conversion-especially on older lead-acid golf carts like Club Cars-bypassing the Onboard Charger (OBC) is a critical step.
In short, the original OBC was designed with charging algorithms specific to lead-acid batteries. Lithium batteries use a dedicated Battery Management System and their own specialized chargers, making the old OBC not only redundant but often an obstacle to operation.
Why Bypass the OBC?
- Algorithm Mismatch: Lead-acid chargers use "equalization" stages with high voltage spikes that can trigger a Lithium BMS to shut down or damage the cells.
- The Interlock Issue: Most OBCs have a safety feature that prevents the cart from moving while plugged in. After a lithium swap, this "interlock" often gets stuck in the "off" position, meaning your cart won't move even if it's fully charged.
- System Simplification: Modern lithium kits come with their own chargers that plug directly into the battery or a bypassed receptacle, rendering the heavy, heat-generating OBC useless.
How to Perform the Bypass (Commonly for Club Car)
The bypass typically involves two main parts: the negative charging path and the interlock logic.
1. The Interlock Bypass (Making the Cart Run)
You need to trick the controller into thinking the charger is disconnected so the motor will run.
- The Process: Locate the small wire (usually blue) and the white wire on the OBC computer side.
- The Fix: Connect these two wires together (using a jumper). This completes the circuit to the solenoid, allowing the cart to drive.
2. The Negative Path Bypass (Making the Cart Charge)
Older OBCs control the flow of electricity through the negative wire of the charging receptacle.
- The Process: Find the heavy-gauge black wire coming from the back of the charging receptacle.
- The Fix: Disconnect this wire from the OBC and connect it directly to the Main Negative terminal of your new lithium battery pack.
Quick Reference Guide
| Feature | Lead-Acid OBC | Lithium Setup (Bypassed) |
| Logic Control | Internal OBC computer | Integrated BMS |
| Safety Interlock | Wired through OBC | Usually managed by BMS or bypassed |
| Charging Path | Receptacle → OBC → Battery | Receptacle → Battery (Direct) |
Important Considerations
Safety Warning: Once you bypass the interlock, the cart may be able to drive away while still plugged into the wall. Always double-check that your charger is disconnected before stepping on the accelerator.
- Fuse Protection: It is highly recommended to install an inline fuse (e.g., 30A) on the charging path for added safety.
- OBC Removal: Once bypassed, the OBC is just dead weight. Most owners choose to remove the heavy aluminum box entirely to save space and weight.
Understanding Controller and Reed Switch Compatibility
When upgrading a golf cart or electric vehicle to lithium, understanding the compatibility between the Controller and the Reed Switch is essential. This is often the primary reason a cart fails to move after a battery swap.
1. What is a Reed Switch?
The reed switch is a small, magnetically activated switch usually located inside the charging receptacle. Its core function is the Safety Interlock.
- How it works: When the charger handle is inserted, a magnet inside the handle opens the reed switch, breaking the circuit to the controller.
- Purpose: It prevents the vehicle from being driven away while still plugged in, which would otherwise tear out the charging cable or damage the port.
2. How the Controller Interacts with the Switch
The motor controller requires an "activation signal" (typically full battery voltage, 36V or 48V) to allow the vehicle to operate. The power path usually looks like this:
Main Battery Positive → Reed Switch → Forward/Reverse Switch → Key Switch → Controller Trigger Terminal.
If the reed switch is damaged, or if it is wired incorrectly during a lithium conversion, the controller never receives the "green light" signal, and the cart will remain dead.
3. Compatibility Issues During Lithium Conversions
When switching to lithium, you typically encounter two compatibility hurdles:
A. The "Open Circuit" Problem (Most Common)
Many lithium kits include a new charging receptacle or suggest bypassing the old one. If you remove the old receptacle that housed the reed switch without re-routing the signal wire, the controller will think the circuit is broken (or a charger is plugged in) and will disable the motor.
B. Voltage Tolerance
If you are increasing your system voltage (e.g., upgrading from 36V to 48V or 56V lithium), you must ensure both your Controller and the Reed Switch circuit can handle the higher voltage.
- Controller: Most stock controllers have a specific voltage ceiling. If the lithium pack's peak voltage is too high, the controller may enter "Over-Voltage Protection" mode.
- Reed Switch: Original reed switches are notoriously fragile. Higher voltages can sometimes cause the internal contacts to "weld" together or fail prematurely.
4. The Common Solution: Bypassing the Reed Switch
Because reed switches are a frequent point of failure, many owners choose to bypass them during a lithium conversion to increase reliability.
- The Method: 1. Locate the small wire (often red or white) coming from the back of the charging receptacle. 2. Disconnect it from the receptacle and connect it directly to the Main Battery Positive terminal (or the positive input wire on the receptacle).
- The Result: The controller receives a constant "ready" signal, allowing the cart to operate at all times.
- The Trade-off: You lose the safety interlock. You must remember to unplug the charger before driving away.
5. Compatibility Checklist
| Component | What to Check |
| Controller | Does it support the nominal and peak voltage of your new lithium pack? |
| Receptacle | Does the new setup maintain a closed circuit to the controller? If not, has a jumper been installed? |
| BMS Signal | Some high-end Lithium BMS units offer their own interlock signal; is it wired to the controller's inhibit pin? |
Battery Placement & Fitment Tips: Avoid Installation Repairs For Lithium Conversions
When performing a lithium conversion on a golf cart, Battery Placement and Fitment are often overlooked, yet they are critical to the system's longevity and safety.
1. Weight Distribution and Balance
Lead-acid batteries are heavy and usually distributed evenly under the seat. Swapping them for a lightweight lithium pack changes the vehicle's center of gravity.
- Center the Load: Aim to place the lithium pack in the middle of the battery tray or closer to the drive axle to maintain traction.
- Balance Side-to-Side: Avoid mounting the battery entirely on one side; this prevents uneven tire wear and maintains stability during high-speed turns.
2. Secure Mounting: Prevent "The Bounce"
Lithium batteries are typically 1/3 the weight of lead-acid. On bumpy terrain, an unsecured battery will bounce, leading to loose terminals or a cracked casing.
- Don't Rely on Gravity: Never just "sit" the battery in the tray. Use hold-down brackets, high-strength nylon straps, or steel tie-downs.
- Tray Modification: If the original tray is too large, use a "Lithium Conversion Base" or a custom aluminum plate to bridge the gaps and provide solid mounting points.
3. Vibration Dampening and Protection
- Rubber Matting: Place rubber vibration pads underneath and on the sides of the battery. This prevents the metal chassis from rubbing through the battery casing and absorbs road shocks.
- Debris Cleanup: Before installation, thoroughly clean out any acid residue or gravel left by the old batteries. Old acid can corrode your new battery casing or mounting hardware.
4. Wiring and Strain Relief
More than half of post-installation repairs are caused by poorly managed cables.
- Leave Some Slack: Do not pull cables bone-tight. Batteries experience micro-movements during travel; cables should have a slight loop or bend to allow for flex.
- Secure the Cables: Use zip ties to anchor heavy power cables to the cart frame. This prevents the weight of the cable from vibrating against the battery terminal, which can snap the terminal post or cause an internal short.
5. Critical Installation Checklist
| Feature | Goal |
| Gap Filling | Use foam blocks or brackets to ensure the battery doesn't move when shaken by hand. |
| Airflow | Ensure a small gap around the battery for heat dissipation; avoid placing it directly against a hot controller. |
| Moisture Shield | While lithium batteries often have IP ratings, mount them behind shields to avoid direct road spray. |
| Terminal Access | Orient the battery so terminals are easy to reach but won't touch the metal seat frame. |
Pro Tip:
The "Set it and Forget it" Secret: After tightening all bolts, use lock washers and a small amount of dielectric grease. This prevents "nuisance trips" caused by loose connections-one of the most common fire risks in lithium conversions.
Recommended Reading: How Long Do Golf Cart Batteries Last? Latest News
Do Cheap Lithium Golf Cart Batteries Hurt Performance? Repairs & Upgrades For Better Runtime
Cheap lithium batteries can definitely hurt your golf cart's performance and often lead to frequent repair needs. While the low price point is tempting, the core issue usually lies in a Battery Management System with an inadequate current rating.
These budget-friendly batteries often fail to provide the high instantaneous current required for climbing hills, carrying heavy loads, or rapid acceleration, which causes the BMS to trip and the vehicle to shut down unexpectedly. Furthermore, these batteries frequently utilize lower-grade cells with poor cycle life and inconsistent capacity, meaning your runtime will drop significantly over time and charging will become inefficient due to cell imbalance.
To improve runtime and performance, specific upgrades are essential, such as installing a high-quality 400A or 500A controller to optimize power delivery or replacing stock wiring with heavy-duty 2AWG cables to reduce resistance and heat.
If you are already stuck with a cheap battery and want to improve its behavior, the most effective repair strategy is often to wire a second matching battery pack in parallel to share the current load or to upgrade to a reputable BMS with a higher discharge rate, ensuring a more stable power output and significantly longer runtime.
Recommended Reading: How Much Does It Cost to Replace Golf Cart Batteries?
Monitoring and Maintaining Your New Lithium Golf Cart Battery
1. Core Charging Principles
Lithium batteries have no "memory effect," so you don't need to wait for them to be fully dead before charging. However, keep these points in mind:
- Avoid Deep Discharge: Try not to let the charge drop below 20%. While most batteries have a protection system, frequently draining them to zero shortens their overall life.
- Use a Dedicated Charger: Never use an old lead-acid charger. Lithium batteries require a specific voltage profile; the wrong charger can damage the battery or even pose a fire risk.
- The "Sweet Spot": Lithium batteries don't like being stored at 100% for long periods. If you won't be using the cart for a few weeks, keeping it at 50%–80% is ideal.
2. Never Charge Below Freezing
This is the "Achilles' heel" of lithium batteries:
- Low-Temp Warning: Never charge the battery if the internal temperature is below 0°C (32°F). Charging in freezing temps causes "lithium plating," which leads to permanent damage.
- Pro Tip: If you live in a cold climate, charge the cart immediately after use while the battery is still warm from operation, or park it in a heated garage.
3. Utilizing the Monitoring System
Your battery has a "brain" called the Battery Management System.
- Check the App: Many modern lithium batteries feature Bluetooth connectivity. Get into the habit of checking the app to monitor cell balancing and internal temperature.
- Dashboard Gauge: Ensure your golf cart has a dedicated digital voltmeter or state-of-charge meter designed for lithium, as old analog needles are often inaccurate for this tech.
4. Physical Maintenance Checklist
No water refilling is required, but basic hardware checks are still essential:
- Keep it Clean: Ensure the battery tops are dry and free of dust. Dirt and moisture can create "tracking" (minor electrical leaks).
- Check Connections: Every few months, check the terminal cables. Golf carts vibrate a lot, and loose connections cause high heat, which can melt terminals. Ensure they are torqued to spec.
- Corrosion Protection: Apply a light coat of anti-corrosion spray to the terminals.
5. Long-term Storage (Winterization)
If you plan to store the cart for several months:
- Charge the battery to roughly 50% – 80%.
- Disconnect the main power switch (or the main cables) to prevent "parasitic draws" from accessories like clocks or USB ports.
- Check the voltage every 2–3 months and top it off slightly if it has dropped significantly.
Conclusion
This comprehensive guide has covered everything from installation and troubleshooting to daily upkeep, all designed to ensure your Lithium Golf Cart Battery maintains peak performance for the long haul. By mastering BMS monitoring, avoiding the pitfalls of low-quality products, and correctly performing the OBC bypass, you have built a power system for your cart that is both highly efficient and safe.
While transitioning from lead-acid to lithium comes with a bit of a learning curve, the benefits of reduced weight, extended lifespan, and superior power are well worth the investment.
As long as you remain diligent about checking terminal tightness and strictly adhere to the "no-charging-below-freezing" rule, your lithium system will reward you with years of reliable operation. Now, it's time to hit the accelerator and fully enjoy the smooth, high-tech ride on your next round of golf.
FAQ
Why does my lithium golf cart battery seem to drop charge quickly?
Rapid discharge is often not a defect in the battery itself. Common causes include Controller and BMS mismatch, poor cell balancing, conflicts with the Onboard Charger (OBC), improper installation, or load mismatch for your terrain. Checking these areas usually solves the problem without needing a new battery.
How can I prevent rapid discharge after converting my golf cart to lithium?
To prevent fast voltage drops, ensure proper OBC bypass, choose high-quality lithium packs, confirm controller and reed switch compatibility, install batteries securely with correct wiring and ventilation, and monitor BMS alerts and cell voltages regularly.
Are cheap lithium golf cart batteries worth it, or should I upgrade?
Budget lithium packs can work for light, flat-terrain use but often have weaker BMS, plastic casing, shorter lifespan, and inconsistent performance. Premium brands like ECO or Bolt provide more reliable performance, especially for heavy loads, hills, or longer runtimes. Investing in a quality pack reduces the risk of rapid discharge and early failure.
related article
Golf Cart Battery Gone Bad? From 'Bad Cell' To The Best Replacement Options